
What if the perfect spring snack has been sitting right in front of you this whole time? You know that feeling — the days are getting longer, the air is warmer, and suddenly everything feels lighter and more alive. Your appetite shifts too. Those heavy, cozy winter snacks you’ve been reaching for start to feel like too much, and your body starts craving something fresh, healthy, and satisfying in a completely different way. That’s exactly what spring snacking is all about, and if you’ve been searching for easy spring snack ideas, quick snack ideas, light snacks for warm weather, or healthy snacks to make at home this season, you are in exactly the right place. There is no better time than now to refresh your snack game and embrace everything this beautiful season has to offer. Whether you’re snacking solo at home or prepping something fun for the whole family, spring has something delicious in store for everyone.
We’ve put together 20 easy spring snack ideas for quick and delicious munching — fresh, simple, and packed with the kind of bright, seasonal flavors that just feel right this time of year. This roundup covers everything from Fresh & Crunchy Veggie Snacks that are hydrating and satisfying, Light & Fruity Bites that are naturally sweet and full of vitamins, Savory Spring Treats that are bold and full of flavor, all the way to Sweet & Satisfying options that nourish your body while hitting every dessert craving. Whether you’re looking for quick healthy snacks, easy snacks for spring gatherings, fun snack ideas for the whole family, or light bites to enjoy between meals — this list has you completely covered. So before you scroll past, ask yourself — when was the last time your snack actually matched the season? Keep reading, because your new favorite spring snack is just a few scrolls away.
Disclaimer: This content is provided for informational purposes only and should not be considered medical, nutritional, or dietary advice. Nutritional values may vary depending on ingredients, brands, and preparation methods. Always consult a qualified healthcare professional or registered dietitian if you have specific dietary needs, health conditions, or concerns.
Fresh & Crunchy Veggie Snacks
Spring is the perfect season to enjoy fresh, raw vegetables at their crispest and most vibrant. These snacks are light, hydrating, and packed with vitamins and minerals that your body craves after the heavier meals of winter. Each bite brings a satisfying crunch that keeps you feeling energized without weighing you down. They’re easy to prep ahead and perfect for grazing throughout the day.
1. Snap Peas with Lemon Herb Dip
Prep Time: 10 minutes | Cook Time: 0 minutes | Serves: 4
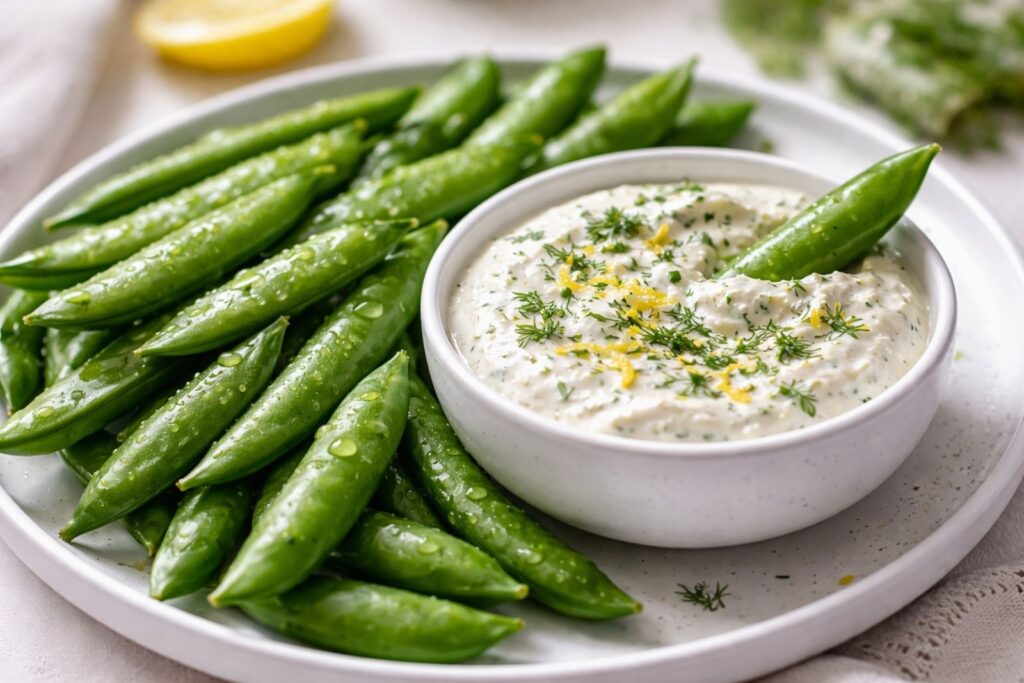
Snap peas are naturally sweet, low in calories, and rich in vitamin C and fiber, making them one of spring’s most beloved snacks. The lemon herb dip adds a bright, zesty flavor that complements the crunch perfectly while keeping the whole snack feeling fresh and light. Together, they make a refreshing bite that’s as nourishing as it is satisfying.
Ingredients:
- 3 cups fresh snap peas, rinsed and trimmed
- 1 teaspoon lemon zest
For the lemon herb dip:
- ¾ cup Greek yogurt
- 1 tablespoon fresh lemon juice
- 1 teaspoon lemon zest
- 1 tablespoon fresh dill, finely chopped
- 1 tablespoon fresh chives, finely chopped
- 1 small garlic clove, minced
- 1 tablespoon olive oil
- Salt and black pepper, to taste
How to Make It:
- Rinse the snap peas thoroughly under cold water and pat dry. Trim the ends if needed and set aside.
- In a small bowl, combine the Greek yogurt, lemon juice, lemon zest, dill, chives, and minced garlic. Stir until smooth and well combined.
- Drizzle in the olive oil and mix again. Season with salt and black pepper to taste.
- Transfer the dip to a small serving bowl and sprinkle with a little extra lemon zest or fresh herbs on top for a finishing touch.
- Arrange the snap peas on a plate or board alongside the dip and serve immediately.
Tip:
For the best flavor, make the dip at least 15 minutes ahead and refrigerate before serving — this gives the herbs time to bloom and the flavors to come together beautifully.
2. Rainbow Veggie Spring Rolls with Peanut Sauce
Prep Time: 20 minutes | Cook Time: 0 minutes | Serves: 4
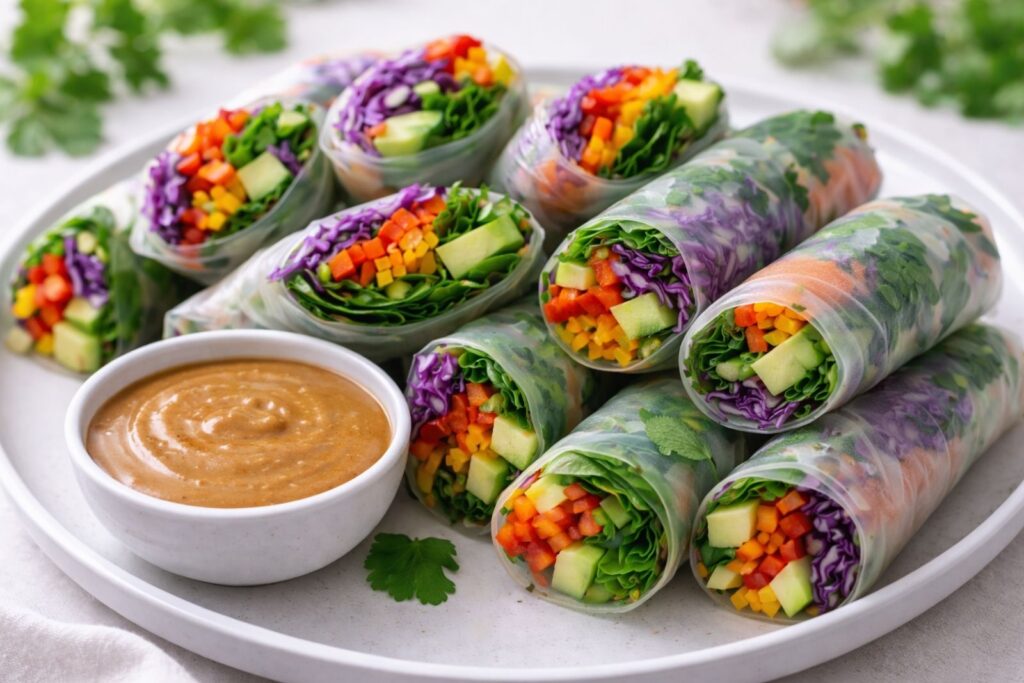
These colorful rolls are loaded with raw vegetables like carrots, purple cabbage, and bell peppers, delivering a wide range of antioxidants and vitamins in every bite. The peanut sauce adds healthy fats and plant-based protein, making this snack surprisingly filling without being heavy. They’re visually stunning and incredibly fun to make, especially with seasonal spring produce.
Ingredients:
- 8 rice paper wrappers
- 1 cup purple cabbage, thinly shredded
- 1 large carrot, julienned
- 1 red bell pepper, thinly sliced
- 1 yellow bell pepper, thinly sliced
- 1 cucumber, julienned
- 1 cup fresh baby spinach or mixed greens
- 1 avocado, thinly sliced
- ¼ cup fresh mint leaves
- ¼ cup fresh cilantro leaves
For the peanut sauce:
- ¼ cup creamy peanut butter
- 2 tablespoons soy sauce
- 1 tablespoon fresh lime juice
- 1 tablespoon honey or maple syrup
- 1 teaspoon sesame oil
- 1 small garlic clove, minced
- 2–3 tablespoons warm water, to thin
How to Make It:
- Prepare all vegetables by washing, peeling, and cutting them into thin, uniform strips. Arrange everything on a clean work surface so assembly is easy and efficient.
- In a small bowl, whisk together the peanut butter, soy sauce, lime juice, honey, sesame oil, and garlic until smooth. Add warm water one tablespoon at a time until the sauce reaches a pourable, dipping consistency. Set aside.
- Fill a large shallow dish or bowl with warm water. Dip one rice paper wrapper into the water for about 10–15 seconds until it becomes soft and pliable. Lay it flat on a clean surface.
- In the center of the wrapper, layer a small handful of spinach, followed by the cabbage, carrot, bell peppers, cucumber, avocado, and a few mint and cilantro leaves. Avoid overfilling to make rolling easier.
- Fold the bottom edge of the wrapper up and over the filling, then fold in both sides. Roll tightly upward to seal, just like a burrito. Repeat with the remaining wrappers and filling.
- Arrange the finished spring rolls on a serving platter and serve immediately with the peanut sauce on the side for dipping.
Tip:
Work with one rice paper wrapper at a time and keep the others dry until ready to use, as they become sticky very quickly once exposed to moisture.
3. Cucumber Rounds with Whipped Feta and Dill
Prep Time: 10 minutes | Cook Time: 0 minutes | Serves: 6

Cucumbers are over 95% water, making them one of the most hydrating snacks you can enjoy during warmer spring days. Topped with creamy whipped feta and fresh dill, each round delivers a satisfying balance of cool, tangy, and herby flavors. This snack is high in calcium and probiotics, supporting bone health and digestion all at once.
Ingredients:
- 3 large cucumbers, sliced into ¼-inch rounds
- 3 tablespoons fresh dill, finely chopped
- 1½ tablespoons olive oil, for drizzling
- Black pepper, to taste
- Optional: a pinch of red pepper flakes or everything bagel seasoning for topping
For the whipped feta:
- 1½ cups feta cheese, crumbled
- ⅓ cup cream cheese, softened
- 3 tablespoons Greek yogurt
- 1½ tablespoons fresh lemon juice
- 2 small garlic cloves, minced
How to Make It:
- Wash and dry the cucumbers thoroughly. Slice them into even ¼-inch rounds and arrange them in a single layer on a clean serving platter. Set aside.
- In a food processor or blender, combine the crumbled feta, cream cheese, Greek yogurt, lemon juice, and garlic. Blend until completely smooth and creamy, scraping down the sides as needed.
- Taste the whipped feta and adjust seasoning if needed. Transfer to a small bowl or piping bag for easy topping.
- Spoon or pipe a generous dollop of whipped feta onto each cucumber round.
- Sprinkle fresh dill evenly over each topped round. Drizzle lightly with olive oil and finish with a crack of black pepper or a pinch of red pepper flakes if desired.
- Arrange on a serving platter and serve immediately for the best texture and freshness.
Tip:
Make the whipped feta up to two days ahead and store it in an airtight container in the fridge, then assemble the rounds just before serving to keep the cucumbers perfectly crisp.
4. Jicama Sticks with Lime and Chili Powder
Prep Time: 15 minutes | Cook Time: 0 minutes | Serves: 4
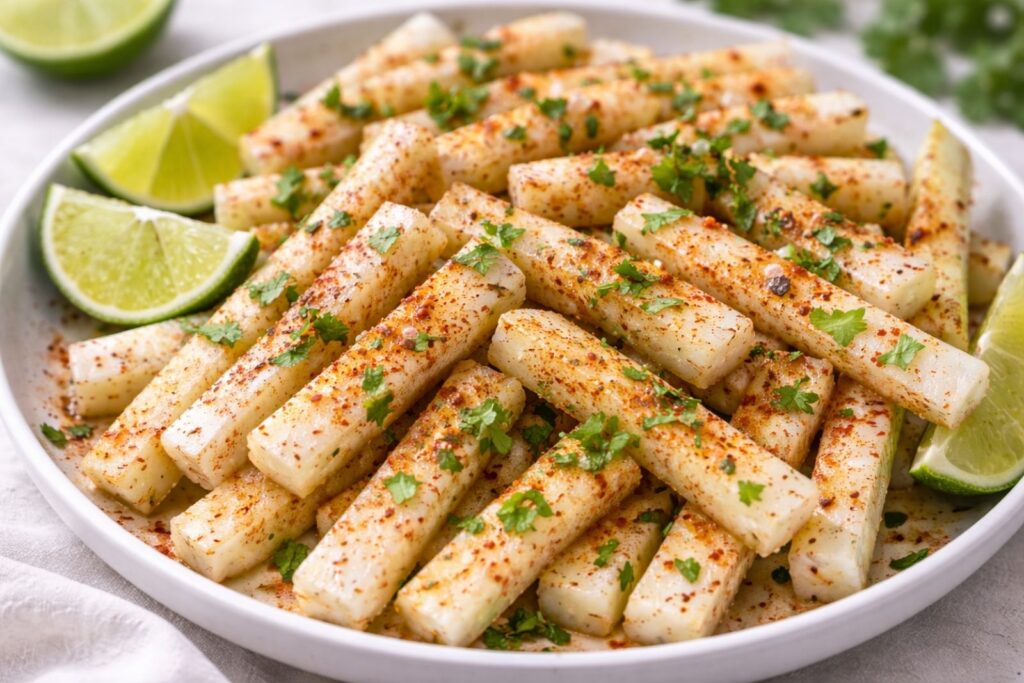
Jicama is a crunchy, mildly sweet root vegetable that’s incredibly low in calories but high in fiber and vitamin C. The combination of tangy lime and warming chili powder gives it a bold, exciting flavor that makes healthy snacking feel like a treat. It’s a wonderful alternative to chips that keeps your gut happy and your energy steady.
Ingredients:
- 1 medium jicama, peeled and cut into sticks
- 2 limes, juiced (plus lime wedges for serving)
- 1½ teaspoons chili powder
- ½ teaspoon sea salt
- ¼ teaspoon cayenne pepper (optional, for extra heat)
- Fresh cilantro, chopped (optional, for garnish)
How to Make It:
- Peel the jicama using a sharp knife or vegetable peeler, making sure to remove both the outer skin and the fibrous layer just beneath it. Cut the jicama in half, then slice into even sticks about ¼-inch thick and 3–4 inches long.
- Arrange the jicama sticks in a single layer on a clean serving platter or in a wide, shallow bowl.
- Squeeze fresh lime juice generously and evenly over all the jicama sticks, making sure each piece gets coated.
- In a small bowl, mix together the chili powder, sea salt, and cayenne pepper if using. Sprinkle the spice mixture evenly over the lime-coated jicama sticks.
- Toss gently to ensure every stick is well coated with the lime juice and spices.
- Garnish with fresh cilantro and serve immediately with extra lime wedges on the side for an added burst of citrus.
Tip:
Jicama can be peeled and cut up to two days in advance — store the sticks in an airtight container with a little water and a squeeze of lime to keep them fresh and crunchy.
5. Radish Chips with Sea Salt and Olive Oil
Prep Time: 10 minutes | Cook Time: 20 minutes | Serves: 3
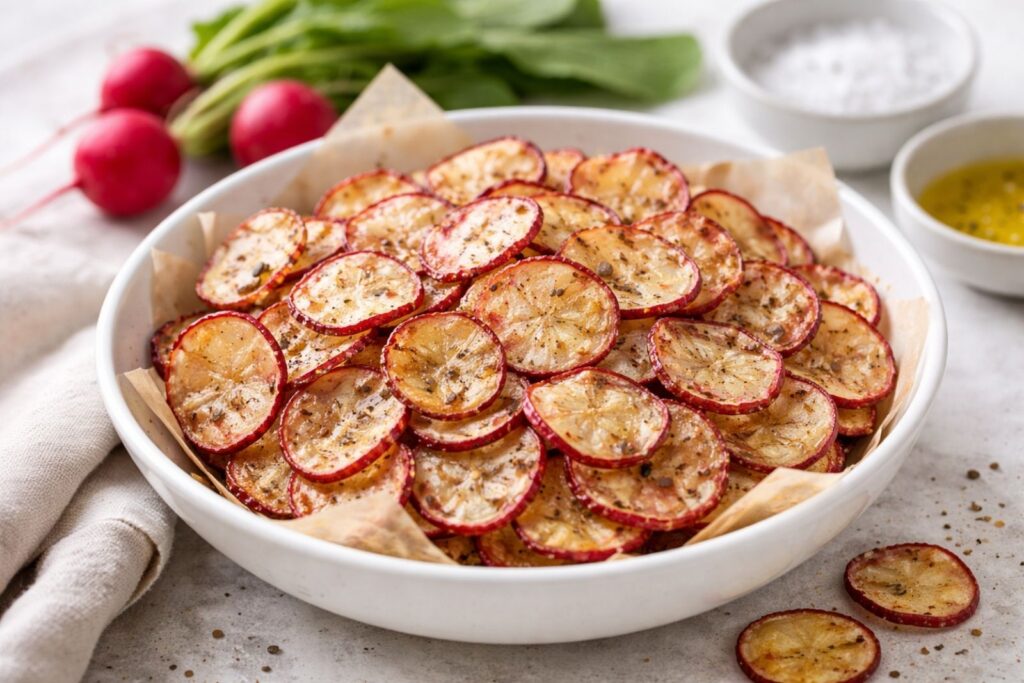
Radishes are rich in antioxidants, folate, and potassium, and when lightly roasted or thinly sliced, they develop a satisfying crispness that rivals any chip. A drizzle of olive oil adds heart-healthy monounsaturated fats, while sea salt enhances their naturally peppery flavor. These are a fantastic low-carb, nutrient-dense snack perfect for spring afternoons.
Ingredients:
- 2 bunches of radishes, tops removed and thinly sliced into rounds
- 2 tablespoons olive oil
- ½ teaspoon sea salt
- ¼ teaspoon black pepper
- Optional: ¼ teaspoon garlic powder or smoked paprika for extra flavor
How to Make It:
- Preheat your oven to 375°F (190°C). Line one or two large baking sheets with parchment paper and set aside.
- Wash and dry the radishes thoroughly. Using a sharp knife or mandoline slicer, slice them into thin, even rounds — about ⅛-inch thick for the crispiest result.
- Place the radish slices in a large bowl. Drizzle with olive oil and toss well to coat every slice evenly.
- Spread the radish slices out in a single layer on the prepared baking sheets, making sure no slices overlap. Overlapping will cause them to steam rather than crisp up.
- Sprinkle sea salt, black pepper, and garlic powder or smoked paprika evenly over the top if using.
- Bake for 18–22 minutes, flipping the slices halfway through, until the edges are golden and crisp. Keep a close eye on them in the last few minutes as they can brown quickly.
- Remove from the oven and let them cool on the baking sheet for a few minutes — they will continue to crisp up as they cool. Serve immediately.
Tip:
The thinner you slice the radishes, the crispier your chips will be — a mandoline slicer gives the most consistent and even results every time.
Light & Fruity Bites
When spring arrives, fresh and tropical fruits take center stage as the most naturally refreshing snack option available. These fruity bites are naturally sweet, hydrating, and full of vitamins that support glowing skin and immunity — exactly what your body needs as the seasons change. They strike the ideal balance between indulgence and nourishment, satisfying your sweet tooth without refined sugar. Light enough for a mid-morning snack, yet flavorful enough to feel like a little treat.
6. Mango Lime Energy Balls
Prep Time: 15 minutes | Cook Time: 0 minutes | Serves: 8

Mangoes are rich in vitamin A and C, supporting immune function and skin health, while the lime adds a bright acidity that balances the natural sweetness beautifully. These no-bake energy balls are easy to prep in batches and offer a quick, wholesome burst of energy throughout the day. They’re the kind of snack that feels indulgent but is doing great things for your body.
Ingredients:
- 1 cup dried mango, roughly chopped
- 1 cup rolled oats
- ¼ cup unsweetened shredded coconut (plus extra for rolling)
- 3 tablespoons honey or maple syrup
- 2 tablespoons almond butter or cashew butter
- 1 lime, zested and juiced
- ¼ teaspoon vanilla extract
- A pinch of sea salt
How to Make It:
- Place the dried mango pieces into a food processor and pulse until they break down into small, sticky pieces. If the mango is very dry, soak it in warm water for 5 minutes first, then drain well before processing.
- Add the rolled oats, shredded coconut, honey, almond butter, lime zest, lime juice, vanilla extract, and sea salt into the food processor with the mango. Pulse until the mixture comes together into a sticky, uniform dough that holds its shape when pressed.
- If the mixture feels too wet, add a tablespoon of oats. If it feels too dry, add a small splash of lime juice or honey to bring it together.
- Scoop out about 1½ tablespoons of the mixture at a time and roll firmly between your palms to form smooth, even balls.
- Roll each ball in extra shredded coconut to coat the outside evenly and give them a beautiful finish.
- Place the finished energy balls on a parchment-lined plate or tray and refrigerate for at least 30 minutes to firm up before serving.
Tip:
These energy balls store beautifully in an airtight container in the fridge for up to one week, or freeze them for up to one month for a longer-lasting snack option.
7. Watermelon Feta Bites with Mint
Prep Time: 10 minutes | Cook Time: 0 minutes | Serves: 6
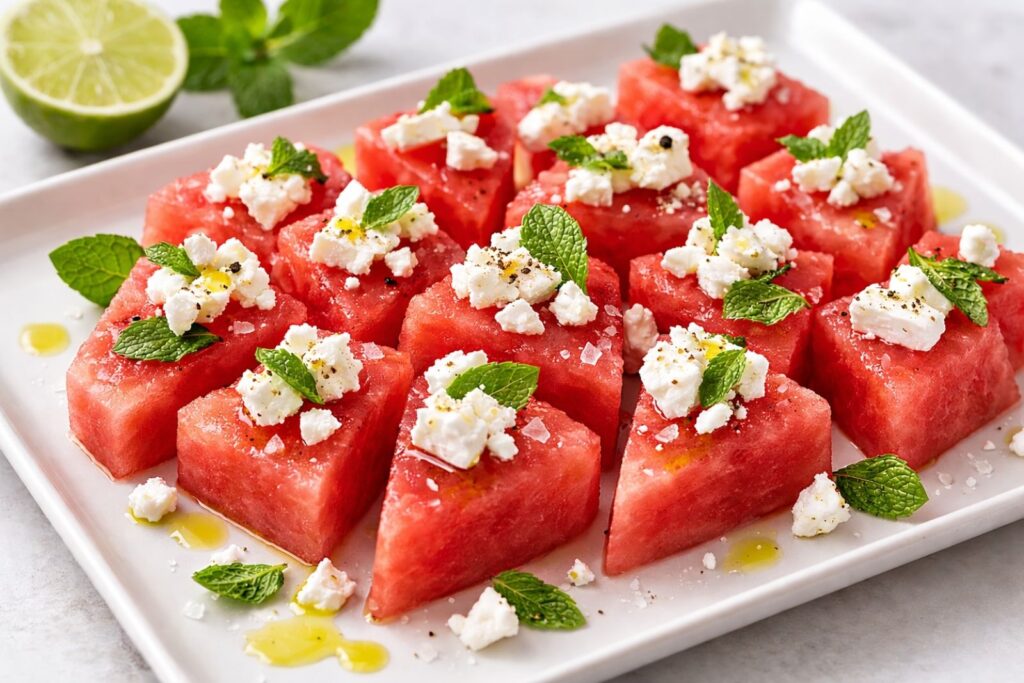
Watermelon is one of the most hydrating fruits available, composed of over 90% water and loaded with lycopene, a powerful antioxidant. The salty feta and fresh mint create a contrast that’s both refreshing and unexpectedly sophisticated for a simple snack. This combination is a staple spring and summer bite that looks beautiful on any plate or board.
Ingredients:
- 6 cups seedless watermelon, cut into 1-inch cubes or triangles
- 1 cup feta cheese, crumbled
- ¼ cup fresh mint leaves, roughly torn or left whole
- 1 tablespoon olive oil, for drizzling
- 1 tablespoon fresh lime juice or lemon juice
- ¼ teaspoon flaky sea salt
- Optional: a pinch of black pepper or chili flakes for a subtle kick
How to Make It:
- Cut the watermelon into even 1-inch cubes or small triangles, removing any seeds if present. Arrange them in a single layer on a wide serving platter or board, leaving a little space between each piece.
- Sprinkle the crumbled feta generously and evenly over the watermelon pieces, making sure each bite gets a good amount of cheese.
- Scatter the fresh mint leaves over the top, distributing them evenly across the platter for both flavor and a beautiful visual finish.
- Drizzle the olive oil lightly over everything, followed by the lime or lemon juice to brighten all the flavors.
- Finish with a light sprinkle of flaky sea salt and a pinch of black pepper or chili flakes if using.
- Serve immediately for the freshest flavor and best texture, or refrigerate for up to 30 minutes before serving if you prefer it slightly chilled.
Tip:
Always assemble this dish just before serving — watermelon releases juice over time, which can make the platter watery and cause the toppings to slide off.
8. Fresh Berries with Vanilla Yogurt Dipping Sauce
Prep Time: 10 minutes | Cook Time: 0 minutes | Serves: 8
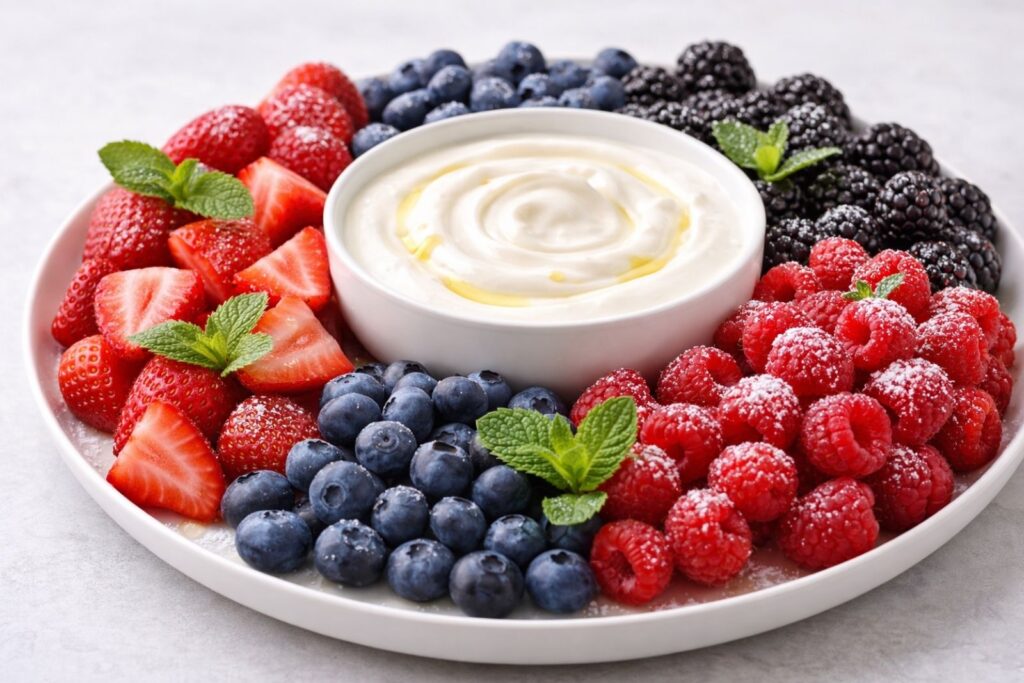
Berries are among the most antioxidant-rich foods on the planet, packed with vitamins C and K, fiber, and anti-inflammatory compounds. Paired with a creamy vanilla yogurt dip, they become a balanced snack with protein, probiotics, and natural sweetness. This is a wonderfully simple snack that feels celebratory and is gentle enough for kids and adults alike.
Ingredients:
- 1 cup fresh strawberries, hulled and halved
- 1 cup fresh blueberries
- 1 cup fresh raspberries
- 1 cup fresh blackberries
- 2 cups plain Greek yogurt
- 2 tablespoons honey, plus more to taste
- 1 teaspoon pure vanilla extract
- 1 tablespoon fresh lemon juice
- Optional: fresh mint leaves and a light dusting of powdered sugar for garnish
How to Make It:
- Gently rinse all the berries under cold running water and lay them out on a clean paper towel to dry completely. Pat them dry carefully, as excess moisture can make the platter watery and affect presentation.
- In a medium mixing bowl, combine the Greek yogurt, honey, vanilla extract, and fresh lemon juice. Stir everything together until the mixture is completely smooth, creamy, and well blended. Taste and add a little extra honey if you prefer a sweeter dip.
- Transfer the vanilla yogurt dipping sauce into a small, pretty serving bowl and place it in the center of a wide serving platter or board.
- Arrange the berries around the dipping bowl in clusters by type — grouping the strawberries, blueberries, raspberries, and blackberries separately creates a colorful, eye-catching display that looks stunning and makes it easy for guests to grab their favorites.
- If using, tuck a few fresh mint leaves between the berry clusters for a pop of green and a light aromatic touch. Finish with a very light dusting of powdered sugar over the berries for an elegant, celebratory look.
- Serve immediately or refrigerate for up to 1 hour before serving. Keep the dipping sauce covered and chilled until ready to enjoy.
Tip:
For the best vanilla yogurt dipping sauce, use full-fat Greek yogurt — it’s thicker, creamier, and clings beautifully to every berry for a more satisfying dip.
9. Pineapple Coconut Chia Bites
Prep Time: 15 minutes | Cook Time: 0 minutes | Serves: 10
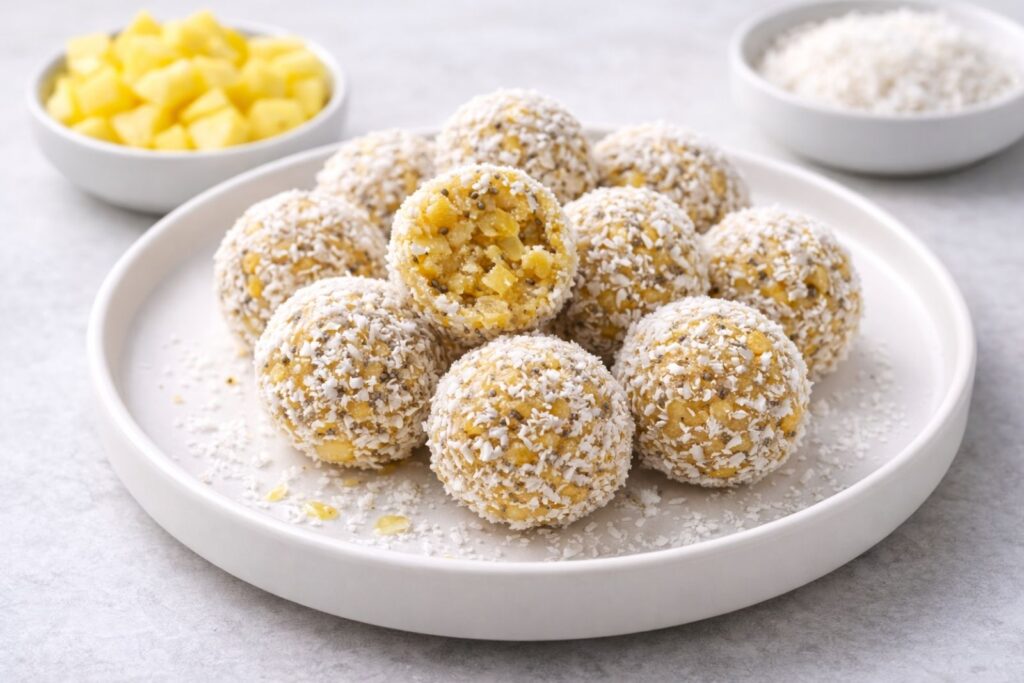
Pineapple contains bromelain, a natural enzyme that supports digestion and reduces inflammation, making it especially great for a light spring snack. Combined with coconut and chia seeds, these bites deliver healthy omega-3 fatty acids and fiber that keep you full and focused. The tropical flavor combination is bright and sunny — perfectly in step with the energy of the spring season.
Ingredients:
- 2 cups fresh pineapple, finely diced
- 1 cup unsweetened shredded coconut
- 3 tablespoons chia seeds
- 2 tablespoons honey or maple syrup
- 1 teaspoon pure vanilla extract
- ¼ teaspoon ground ginger
- Optional: extra shredded coconut for rolling
How to Make It:
- Finely dice the fresh pineapple into very small pieces and pat them dry thoroughly with a paper towel to remove as much excess moisture as possible. This step is important — too much moisture will prevent the bites from holding their shape.
- In a large mixing bowl, combine the diced pineapple, shredded coconut, chia seeds, honey or maple syrup, vanilla extract, and ground ginger. Stir everything together until fully combined and evenly mixed.
- Cover the bowl with plastic wrap and refrigerate the mixture for at least 30 minutes. This allows the chia seeds to absorb the moisture and helps the mixture firm up so it’s easy to shape.
- Once chilled, remove the mixture from the refrigerator and scoop out portions using a tablespoon or small cookie scoop. Roll each portion firmly between your palms to form a smooth, compact ball.
- If desired, roll each bite in a small dish of extra shredded coconut to coat the outside for added texture and a beautiful tropical finish.
- Arrange the finished bites on a serving platter or place them in a container lined with parchment paper. Refrigerate for an additional 15 minutes before serving to help them hold their shape.
Tip:
Make sure to pat the pineapple as dry as possible before mixing — the drier the pineapple, the better the bites will hold together without crumbling apart in your hands.
10. Cherry Pistachio Trail Mix
Prep Time: 5 minutes | Cook Time: 0 minutes | Serves: 6
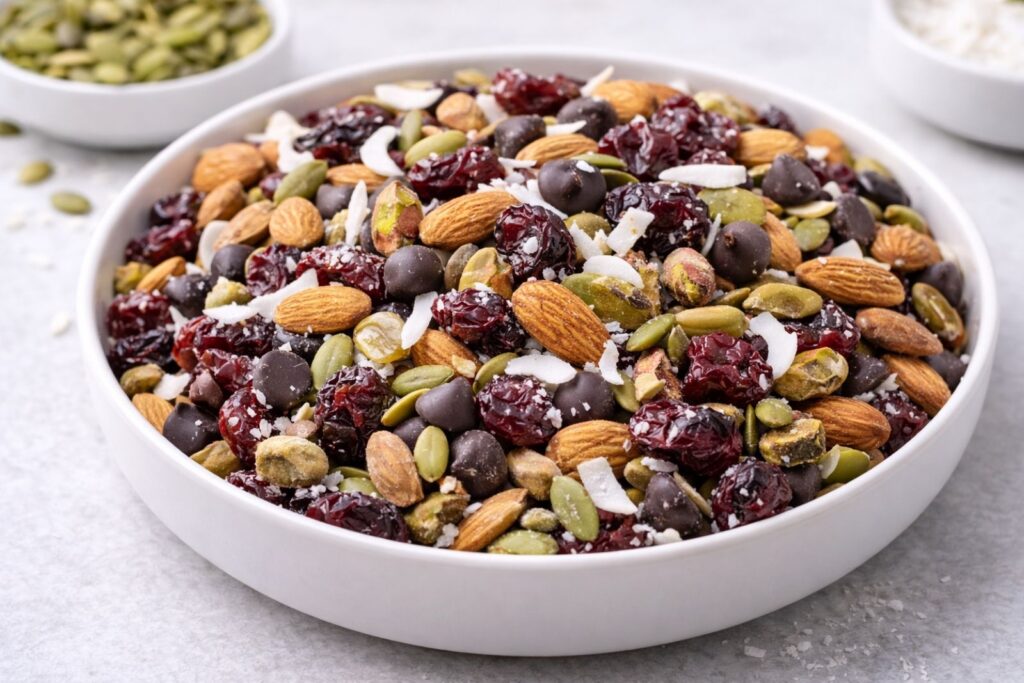
Cherries are rich in melatonin and anthocyanins, which support restful sleep and reduce muscle soreness, while pistachios provide protein, healthy fats, and essential minerals. This trail mix is one of the most nutrient-dense options in the snack world, offering sustained energy without a sugar crash. It’s a portable, no-prep snack that’s perfect for spring picnics, hikes, or desk-side munching.
Ingredients:
- 1 cup dried tart cherries
- 1 cup roasted pistachios, shelled
- ½ cup raw almonds
- ½ cup dark chocolate chips or chunks
- ¼ cup pumpkin seeds
- ¼ cup unsweetened coconut flakes
- A pinch of sea salt
How to Make It:
- Measure out all ingredients and set them side by side on a clean flat surface so assembling the mix is quick and easy.
- In a large mixing bowl, combine the dried cherries, pistachios, almonds, pumpkin seeds, and coconut flakes. Toss everything together until evenly distributed.
- Add the dark chocolate chips and a pinch of sea salt. Gently toss once more to combine without breaking up the chocolate pieces.
- Taste the mix and adjust as needed — add a little more sea salt for a savory edge or extra cherries for added sweetness.
- Divide into individual portions or serve in a large bowl for sharing on a picnic or gathering spread.
- Store any leftovers in an airtight container or resealable bag at room temperature for up to two weeks.
Tip:
Portion the trail mix into small resealable bags ahead of time for an easy grab-and-go snack that’s ready whenever you need it.
Savory Spring Treats
For those who crave something a little more savory, spring offers a beautiful abundance of herbs, greens, and vegetables that shine in bold, satisfying snacks. These treats feel hearty and flavorful without being overly heavy, striking the perfect balance for the lighter appetite that warmer weather tends to inspire. Many of these snacks are high in protein and fiber, making them a smart choice when you need something to hold you over between meals. They’re equally at home on a party platter or in your everyday snack rotation.
11. Baked Zucchini Rounds with Parmesan
Prep Time: 10 minutes | Cook Time: 20 minutes | Serves: 4
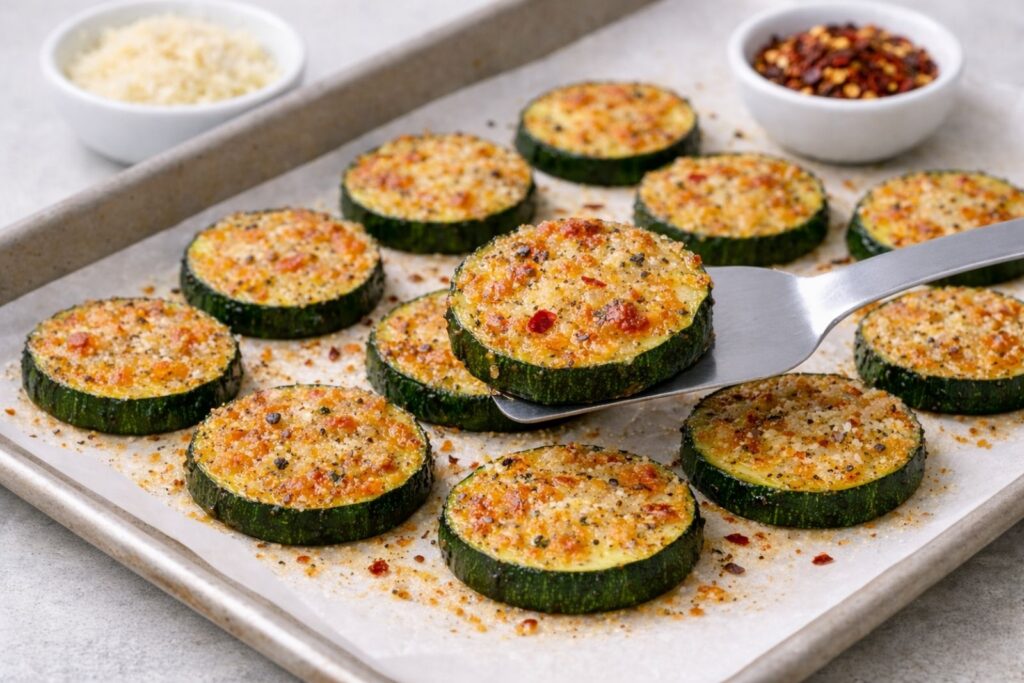
Zucchini is low in calories and high in vitamin B6, potassium, and antioxidants, making it a nutritional powerhouse that often goes underrated. Baking them with Parmesan creates a golden, crispy edge that gives you all the satisfaction of a chip with a fraction of the guilt. This is a wonderfully simple snack that showcases how delicious wholesome spring vegetables can truly be.
Ingredients:
- 3 medium zucchini, sliced into ¼-inch rounds
- ¾ cup freshly grated Parmesan cheese
- 1 tablespoon olive oil
- ½ teaspoon garlic powder
- ½ teaspoon dried Italian seasoning
- ¼ teaspoon black pepper
- ¼ teaspoon sea salt
- Optional: a pinch of red pepper flakes for a subtle kick
How to Make It:
- Preheat your oven to 400°F (200°C). Line a large baking sheet with parchment paper and set aside.
- Wash and dry the zucchini thoroughly. Slice them into even ¼-inch rounds and place them in a large bowl. Drizzle with olive oil and toss to coat every slice evenly.
- In a small bowl, mix together the grated Parmesan, garlic powder, Italian seasoning, black pepper, sea salt, and red pepper flakes if using.
- Arrange the zucchini rounds in a single layer on the prepared baking sheet, making sure no slices overlap for the crispiest result.
- Sprinkle the Parmesan mixture generously over each round, pressing it down lightly so it adheres well to the surface.
- Bake for 18–22 minutes until the edges are golden and the Parmesan is crispy and beautifully browned. Let them cool on the baking sheet for 3–5 minutes before serving — they will continue to crisp up as they cool.
Tip:
Pat the zucchini rounds dry with a paper towel before adding the olive oil — removing excess moisture is the key to getting that perfectly golden, crispy Parmesan crust.
12. Mini Caprese Skewers with Balsamic Drizzle
Prep Time: 15 minutes | Cook Time: 0 minutes | Serves: 6
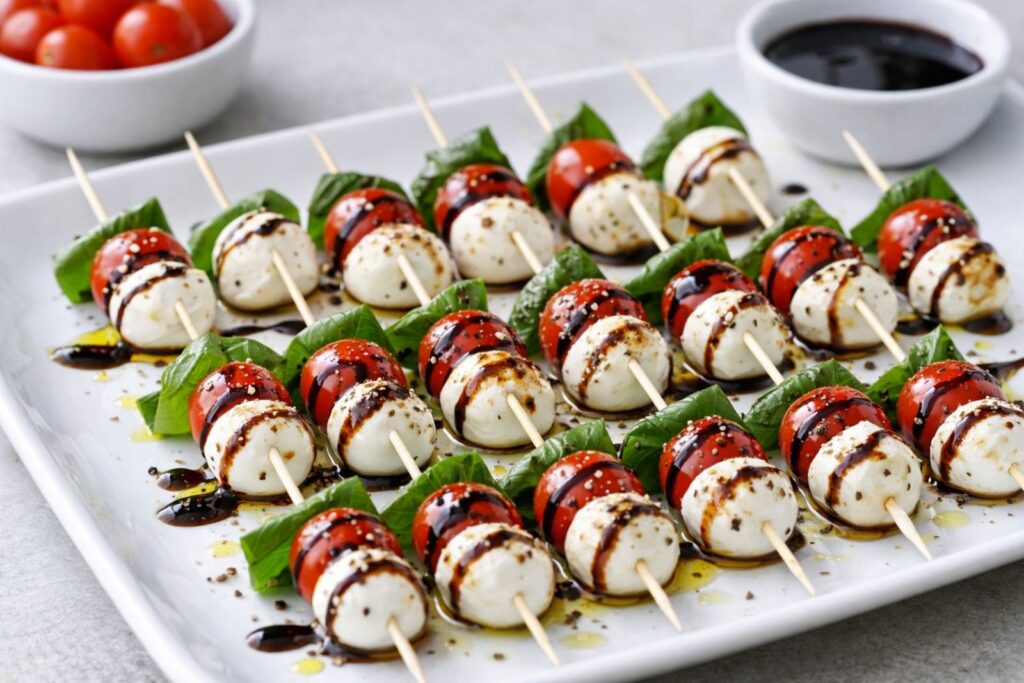
Fresh mozzarella provides a good source of protein and calcium, while tomatoes deliver lycopene and vitamin C in every juicy bite. The balsamic drizzle adds a touch of acidity and natural sweetness that ties the whole skewer together beautifully. These are endlessly elegant, incredibly easy to assemble, and feel festive enough for any spring gathering.
Ingredients:
- 12 oz fresh mozzarella balls (ciliegine or bocconcini), halved if large
- 1 pint cherry or grape tomatoes
- 1 cup fresh basil leaves
- 3 tablespoons extra virgin olive oil
- ½ cup balsamic vinegar (for reduction) or store-bought balsamic glaze
- ¼ teaspoon flaky sea salt
- ¼ teaspoon freshly cracked black pepper
- 24 small appetizer skewers or toothpicks
How to Make It:
- If making your own balsamic drizzle, pour the balsamic vinegar into a small saucepan over medium-low heat. Simmer gently for 10–12 minutes, stirring occasionally, until it reduces by half and coats the back of a spoon. Remove from heat and let it cool — it will thicken further as it cools. Skip this step if using store-bought balsamic glaze.
- Rinse and thoroughly dry the cherry tomatoes and fresh basil leaves. Pat the mozzarella balls dry with a paper towel as well.
- To assemble each skewer, thread one basil leaf (folded gently in half), followed by one cherry tomato, and then one mozzarella ball onto each appetizer skewer or toothpick.
- Arrange the finished skewers neatly on a large serving platter in a single layer.
- Drizzle the extra virgin olive oil lightly over all the skewers, followed by a generous drizzle of the balsamic glaze.
- Finish with a light sprinkle of flaky sea salt and freshly cracked black pepper right before serving for the best flavor.
Tip:
Assemble the skewers up to two hours ahead and refrigerate them uncovered, but always add the balsamic drizzle and olive oil right before serving — this keeps the basil bright green and prevents the skewers from getting soggy.
13. Crispy Chickpea Snack with Lemon and Herbs
Prep Time: 10 minutes | Cook Time: 30 minutes | Serves: 5
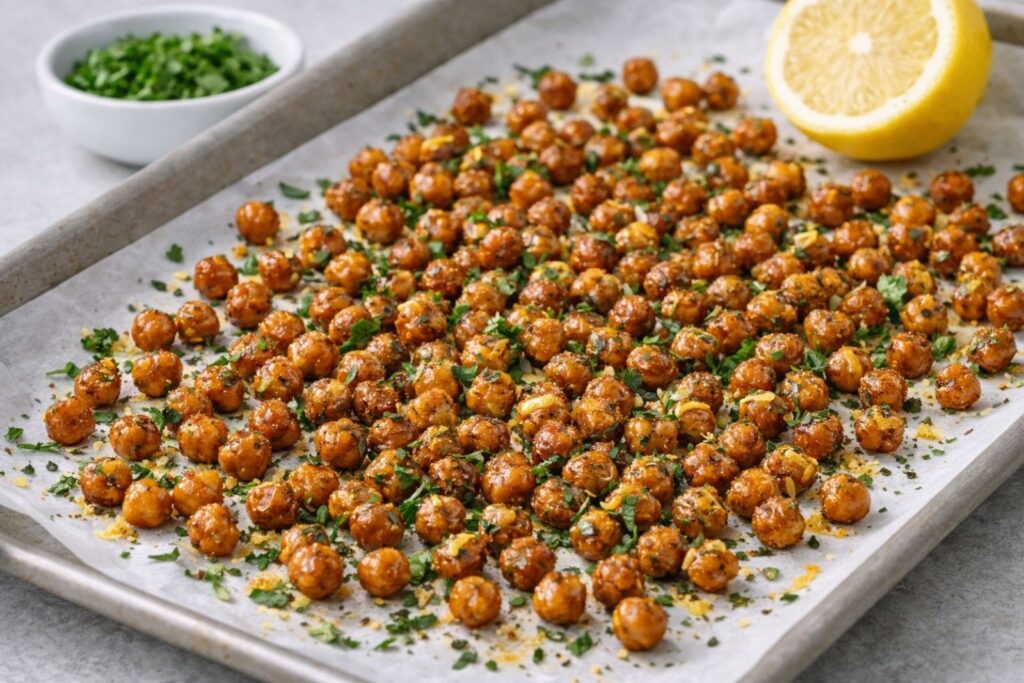
Chickpeas are an excellent plant-based source of protein and fiber, making them one of the most satisfying and nutritious snack bases you can choose. When roasted until crispy and seasoned with lemon and fresh herbs, they become completely addictive in the best possible way. They support gut health, stabilize blood sugar, and give you lasting energy — a true spring snacking win.
Ingredients:
- 2 cans (15 oz each) chickpeas, drained, rinsed, and thoroughly dried
- 3 tablespoons extra virgin olive oil
- 1 teaspoon lemon zest
- 2 tablespoons fresh lemon juice
- 1 teaspoon garlic powder
- 1 teaspoon smoked paprika
- ½ teaspoon onion powder
- ½ teaspoon dried oregano
- ½ teaspoon dried thyme
- ½ teaspoon sea salt
- ¼ teaspoon freshly cracked black pepper
- 2 tablespoons fresh parsley, finely chopped (for finishing)
How to Make It:
- Preheat your oven to 400°F (200°C). Line a large baking sheet with parchment paper and set aside.
- Drain and rinse the chickpeas thoroughly, then spread them out onto a clean kitchen towel or several layers of paper towels. Pat them as dry as possible and let them air dry for at least 5 minutes — this step is essential for maximum crispiness.
- Transfer the dried chickpeas to a large bowl. Drizzle with olive oil and toss well to coat every chickpea evenly.
- In a small bowl, combine the garlic powder, smoked paprika, onion powder, dried oregano, dried thyme, sea salt, and black pepper. Sprinkle the spice mixture over the chickpeas and toss again until every chickpea is well coated.
- Spread the seasoned chickpeas in a single, even layer on the prepared baking sheet, making sure they are not overcrowded for the crispiest result.
- Roast for 25–30 minutes, shaking the pan gently every 10 minutes, until the chickpeas are deeply golden and audibly crunchy. Keep a close eye on them in the last 5 minutes to prevent burning.
- Remove from the oven and immediately drizzle with fresh lemon juice and sprinkle with lemon zest and freshly chopped parsley. Toss gently and let them cool on the baking sheet for 5 minutes before serving.
Tip:
Make sure the chickpeas are completely dry before roasting — any remaining moisture will steam them in the oven instead of crisping them up. For extra crunch, remove the thin outer skins from each chickpea before seasoning and roasting.
14. Spring Onion and Chive Cream Cheese Pinwheels
Prep Time: 15 minutes | Cook Time: 0 minutes | Serves: 8

Chives and spring onions are among the first herbs to emerge each season, and they bring a gentle, fresh allium flavor that pairs beautifully with creamy cheese. These pinwheels are rich in vitamins K and C from the herbs while offering satisfying protein and fat from the cream cheese filling. They’re easy to make ahead, slice beautifully, and disappear quickly at any spring gathering.
Ingredients:
- 4 large flour tortillas (10-inch)
- 16 oz cream cheese, softened to room temperature
- ½ cup fresh chives, finely chopped
- ½ cup spring onions, thinly sliced (green and white parts)
- 1 teaspoon garlic powder
- 1 teaspoon onion powder
- ½ teaspoon lemon zest
- ½ teaspoon sea salt
- ¼ teaspoon freshly cracked black pepper
- ½ teaspoon dried dill
- Optional: 4 oz thinly sliced smoked salmon or turkey for an extra layer of flavor
How to Make It:
- Remove the cream cheese from the refrigerator at least 30 minutes before starting so it softens fully and spreads easily without tearing the tortillas.
- In a large mixing bowl, combine the softened cream cheese, chopped chives, sliced spring onions, garlic powder, onion powder, lemon zest, dried dill, sea salt, and black pepper. Mix everything together thoroughly until the filling is smooth, creamy, and evenly combined.
- Lay one flour tortilla flat on a clean work surface. Spread a generous, even layer of the cream cheese mixture all the way to the edges, leaving only a ¼-inch border around the outside to prevent spillage when rolling.
- If using smoked salmon or turkey, layer it evenly over the cream cheese filling before rolling.
- Starting from one end, roll the tortilla up tightly and evenly into a firm log shape. Wrap it snugly in plastic wrap, twisting both ends to secure it well.
- Repeat with the remaining tortillas and filling. Refrigerate all the rolls for at least 1 hour, or up to 24 hours — chilling firms up the filling and makes slicing clean and effortless.
- When ready to serve, unwrap each roll and use a sharp knife to slice them into ¾-inch to 1-inch pinwheels. Arrange them cut side up on a serving platter and garnish with a few extra snipped chives on top.
Tip:
Chilling the rolls overnight gives the flavors time to meld together beautifully and makes the pinwheels even easier to slice cleanly. Use a sharp serrated knife with a gentle sawing motion for the neatest, most picture-perfect cuts.
15. Edamame with Sea Salt and Sesame Seeds
Prep Time: 5 minutes | Cook Time: 10 minutes | Serves: 3
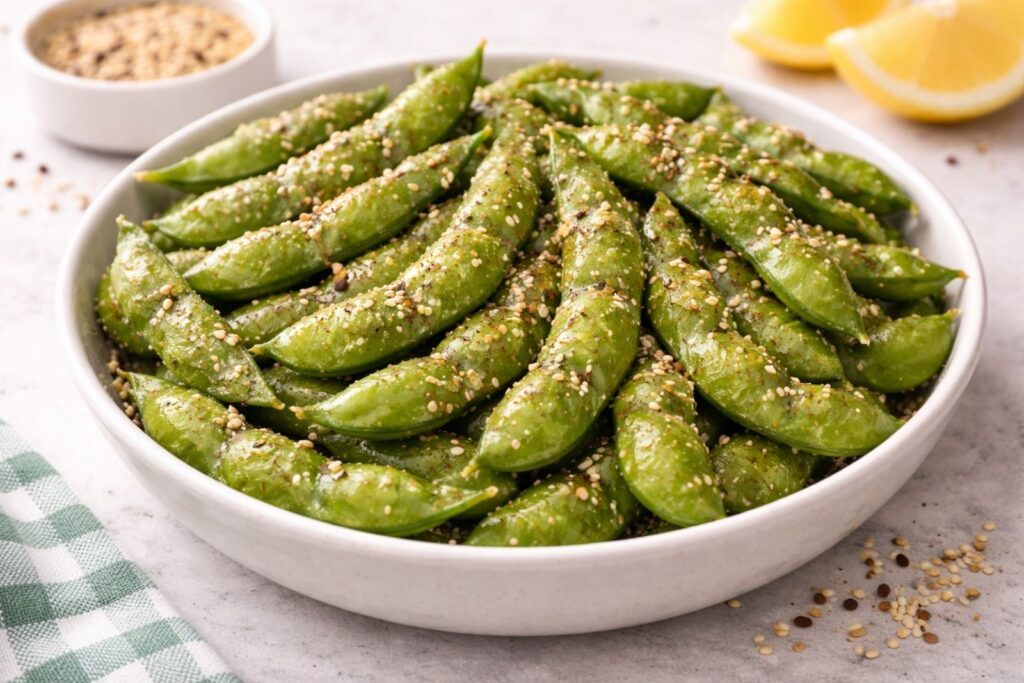
Edamame is one of the best plant-based complete proteins available, containing all nine essential amino acids along with iron, calcium, and folate. Lightly salted and topped with toasted sesame seeds, this snack is as simple as it is deeply nourishing. It’s a go-to spring snack that takes minutes to prepare and leaves you feeling genuinely satisfied.
Ingredients:
- 3 cups frozen edamame, in the shell or shelled (your preference)
- 1 tablespoon toasted sesame seeds
- 1 teaspoon flaky sea salt, plus more to taste
- 1 teaspoon sesame oil (optional, for extra depth of flavor)
- ¼ teaspoon black pepper
- Optional: a pinch of red pepper flakes for a gentle kick
- Optional: a light squeeze of fresh lemon juice for brightness
How to Make It:
- Bring a medium pot of water to a rolling boil over high heat. Add a generous pinch of salt to the water to season the edamame as it cooks.
- Add the frozen edamame to the boiling water and cook for 4–5 minutes until they are bright green, tender, and heated all the way through. Be careful not to overcook — they should remain slightly firm and vibrant in color.
- Drain the edamame thoroughly in a colander and shake off any excess water. Transfer them immediately to a large mixing bowl while still warm so the seasoning adheres well.
- If using sesame oil, drizzle it over the warm edamame and toss gently to coat each piece evenly with a light, nutty layer of flavor.
- Sprinkle the flaky sea salt and black pepper evenly over the edamame and toss once more to distribute the seasoning throughout.
- Transfer to a serving bowl and finish with a generous sprinkle of toasted sesame seeds over the top. Add a pinch of red pepper flakes and a light squeeze of fresh lemon juice if using. Serve immediately while warm for the best flavor and texture.
Tip:
Toast the sesame seeds yourself in a dry skillet over medium heat for 2–3 minutes, stirring constantly, until they turn golden and fragrant — freshly toasted sesame seeds have a far deeper, nuttier flavor than pre-toasted ones from a jar.
Sweet & Satisfying
Just because you’re reaching for something sweet doesn’t mean you have to compromise on nutrition — and this category proves exactly that. These treats are crafted with wholesome ingredients like nuts, seeds, fruit, and natural sweeteners that deliver real energy and real flavor. They’re the kind of snacks that satisfy a dessert craving while still supporting your wellness goals, which feels especially aligned with the fresh-start energy of spring. Whether you need an afternoon pick-me-up or a post-workout bite, these sweet options have you covered.
16. Lemon Poppy Seed Energy Bites
Prep Time: 15 minutes | Cook Time: 0 minutes | Serves: 6
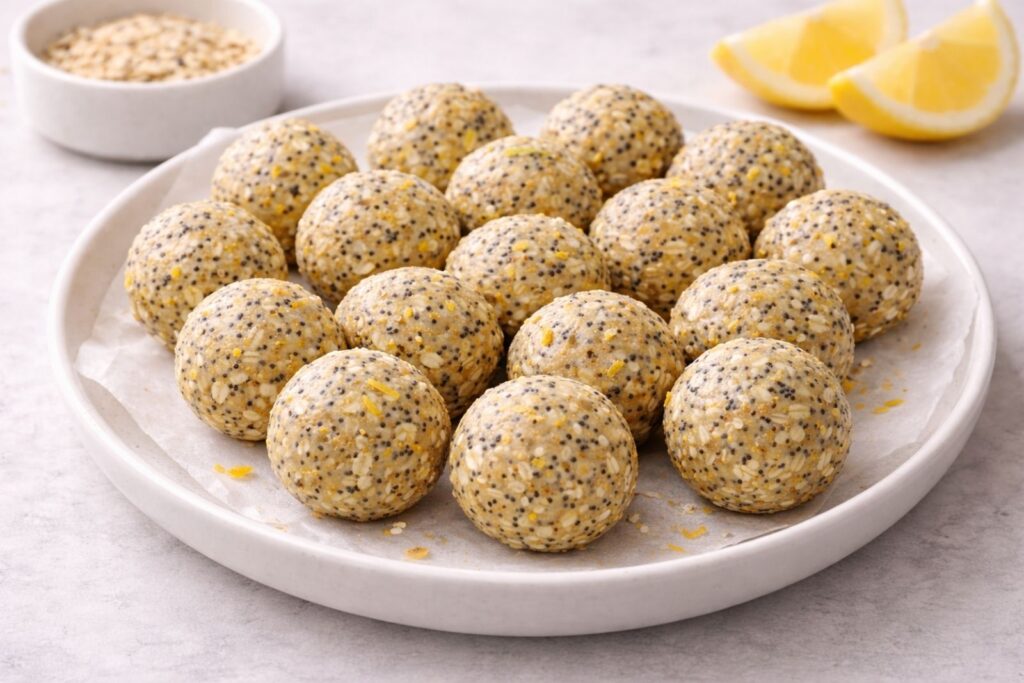
Lemon is a natural mood booster rich in vitamin C, and poppy seeds add a subtle crunch along with calcium and healthy fats. These no-bake bites come together quickly with oats, honey, and lemon zest for a bright, cheerful flavor that screams spring. They’re the perfect little burst of energy when the afternoon slump hits and you need something wholesome and uplifting.
Ingredients:
- 1 ½ cups rolled oats
- ⅓ cup honey
- ½ cup almond butter
- 2 tablespoons poppy seeds
- Zest of 2 lemons
- 2 tablespoons fresh lemon juice
- 1 teaspoon vanilla extract
- ¼ teaspoon sea salt
- Optional: 2 tablespoons shredded coconut for rolling
How to Make It:
- In a large mixing bowl, combine the rolled oats, poppy seeds, lemon zest, and sea salt. Stir together until evenly mixed.
- Add the almond butter, honey, fresh lemon juice, and vanilla extract to the bowl. Stir everything together until a thick, sticky dough forms and all the oats are fully coated.
- Cover the bowl with plastic wrap and refrigerate the mixture for 20–30 minutes. Chilling the dough makes it much easier to roll into smooth, even balls.
- Once chilled, scoop out about 1 tablespoon of dough at a time and roll between your palms into a ball. If using shredded coconut, roll each bite in it for a light, delicate coating.
- Place the finished bites onto a parchment-lined tray or plate. Repeat until all the dough is used up — you should get roughly 18–20 bites depending on size.
- Refrigerate for another 10–15 minutes to firm up before serving. Store any leftovers in an airtight container in the fridge for up to one week.
Tip:
If your dough feels too sticky to roll, add a tablespoon of oats at a time until it firms up just enough to handle. If it feels too dry, a small drizzle of honey or lemon juice will bring it right back together.
17. Coconut Date Bars with Lime Zest
Prep Time: 15 minutes | Cook Time: 0 minutes | Serves: 8
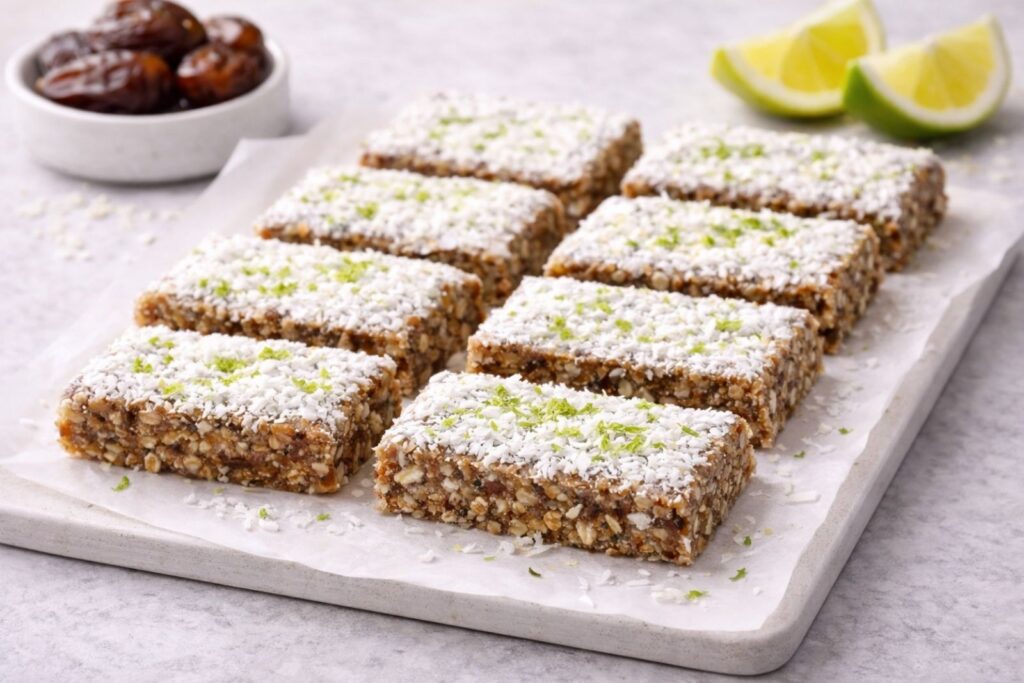
Dates are nature’s candy — naturally sweet and rich in fiber, potassium, and magnesium, they provide a slow-releasing energy that keeps you going without spiking blood sugar. The lime zest cuts through the richness of the coconut and dates with a citrusy brightness that feels incredibly fresh. These bars are a satisfying, whole-food treat that tastes far more indulgent than it actually is.
Ingredients:
- 2 cups Medjool dates, pitted
- 1 cup unsweetened shredded coconut, plus extra for topping
- 1 cup raw cashews
- Zest of 2 limes
- 1 tablespoon fresh lime juice
- 1 teaspoon vanilla extract
- ¼ teaspoon sea salt
- Optional: 1 tablespoon coconut oil if the mixture feels too dry
How to Make It:
- Line an 8×8-inch baking pan with parchment paper, leaving some overhang on the sides for easy lifting later. Set aside.
- Add the raw cashews to a food processor and pulse until they break down into a coarse, crumbly texture. Be careful not to over-process into a paste — you want a little texture remaining.
- Add the pitted Medjool dates, shredded coconut, lime zest, lime juice, vanilla extract, and sea salt to the food processor. Process everything together until the mixture is sticky and begins to clump together into a thick dough. If it looks too dry, add coconut oil one teaspoon at a time until it comes together.
- Transfer the mixture into the prepared pan and press it down firmly and evenly using the back of a spoon or your fingers. The more firmly you press, the better the bars will hold their shape when cut.
- Sprinkle a generous layer of shredded coconut over the top and press it down lightly so it adheres to the surface.
- Refrigerate for at least 1 hour until firm. Once set, lift the slab out using the parchment overhang and place it on a cutting board. Slice into 8 even bars and serve chilled. Store in an airtight container in the fridge for up to one week.
Tip:
Use fresh Medjool dates rather than dried, pre-packaged ones for the best results — they’re naturally softer, stickier, and far more flavorful, which means your bars will hold together beautifully without needing any added sweetener.
18. Raspberry Almond Chia Pudding Cups
Prep Time: 10 minutes | Cook Time: 0 minutes | Serves: 3
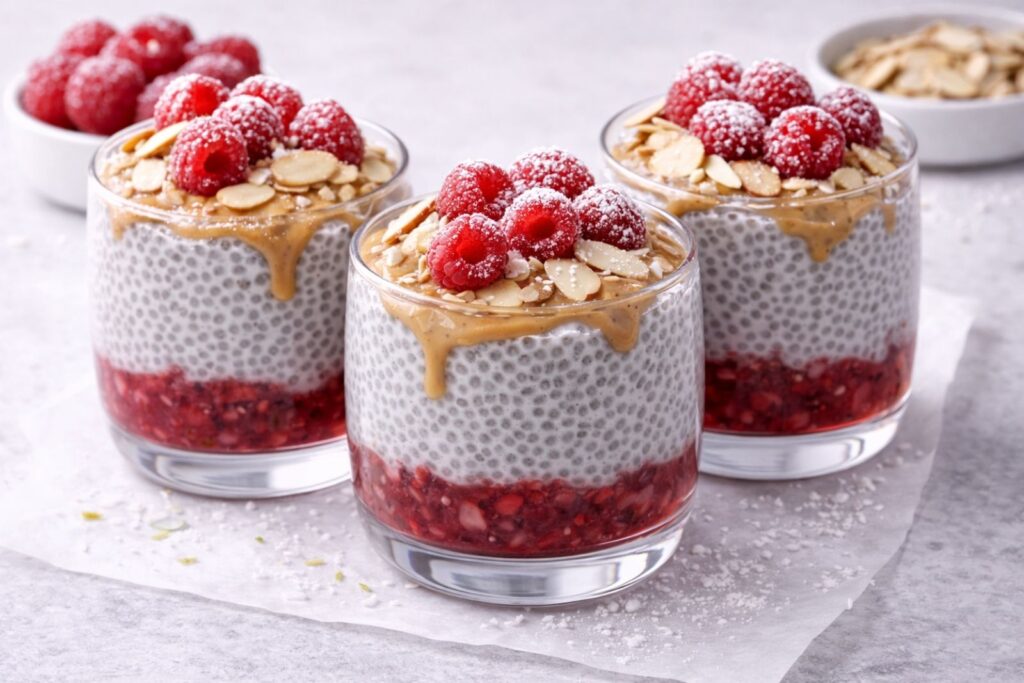
Raspberries are exceptionally high in fiber and antioxidants, and they bring a gorgeous color and tartness that balances the creamy richness of the chia pudding perfectly. Almonds add vitamin E and healthy fats, supporting skin health and keeping you fuller for longer. This is a beautiful, make-ahead snack that looks as elegant as it tastes and feels truly nourishing.
Ingredients:
- ¼ cup chia seeds
- 1 ½ cups unsweetened almond milk
- 2 tablespoons maple syrup or honey
- 1 teaspoon vanilla extract
- 1 cup fresh raspberries, plus extra for topping
- ¼ cup sliced almonds, toasted
- 2 tablespoons almond butter
- Pinch of sea salt
- Optional: a light dusting of powdered sugar
How to Make It:
- In a medium mixing bowl, whisk together the chia seeds, almond milk, maple syrup, vanilla extract, and sea salt until everything is fully combined. Make sure no chia seeds are clumped together at the bottom, as this affects the final texture.
- Cover the bowl with plastic wrap and refrigerate for at least 4 hours or overnight. After the first 30 minutes, give the mixture a good stir to break up any clumps that may have formed as the chia seeds begin to swell.
- While the pudding sets, prepare the raspberry layer. Place 1 cup of fresh raspberries in a small bowl and gently mash them with a fork until they form a loose, chunky compote. You can leave some pieces intact for texture — it doesn’t need to be perfectly smooth.
- Once the chia pudding is thick and fully set, remove it from the fridge and give it one final stir. Taste and adjust sweetness if needed with an extra drizzle of maple syrup.
- To assemble, spoon a layer of the mashed raspberry compote into the bottom of each serving cup. Add a generous layer of chia pudding on top, then drizzle with almond butter.
- Finish each cup with a handful of fresh raspberries, a sprinkle of toasted sliced almonds, and a light dusting of powdered sugar if desired. Serve immediately or refrigerate until ready to enjoy. These cups keep well in the fridge for up to 3 days.
Tip: Toast the sliced almonds in a dry skillet over medium heat for 2–3 minutes, stirring constantly, until they turn lightly golden and fragrant — this small step adds a deep, nutty warmth that takes the entire pudding cup to the next level.
19. Matcha White Chocolate Energy Balls
Prep Time: 15 minutes | Cook Time: 0 minutes | Serves: 5

Matcha provides a calm, sustained energy boost thanks to its unique combination of caffeine and L-theanine, which promotes focus without the jitters of coffee. The white chocolate adds just enough sweetness to make these feel like a treat while the other wholesome ingredients keep them grounded in nutrition. They’re a sophisticated, energizing snack that bridges the gap between indulgence and wellness beautifully.
Ingredients:
- 1 ½ cups rolled oats
- 2 teaspoons matcha powder, plus extra for dusting
- ⅓ cup honey or maple syrup
- ½ cup cashew butter
- ½ cup white chocolate chips, plus extra for drizzling
- 1 teaspoon vanilla extract
- 2 tablespoons coconut flour
- ¼ teaspoon sea salt
- Optional: 2 tablespoons shredded coconut for rolling
How to Make It:
- In a large mixing bowl, combine the rolled oats, matcha powder, coconut flour, and sea salt. Whisk the dry ingredients together until the matcha is evenly distributed throughout — this ensures every bite has that signature earthy green flavor without any uneven pockets.
- Add the cashew butter, honey, and vanilla extract to the bowl. Stir everything together until a thick, cohesive dough forms and all the dry ingredients are fully incorporated into the wet mixture.
- Fold in the white chocolate chips gently using a spatula or wooden spoon, distributing them as evenly as possible throughout the dough.
- Cover the bowl with plastic wrap and refrigerate for 20–30 minutes. Chilling firms up the dough significantly and makes rolling the balls much cleaner and easier to handle.
- Once chilled, scoop out about 1 tablespoon of dough at a time and roll between your palms into smooth, even balls. If rolling in shredded coconut, do so immediately after shaping each ball before moving on to the next.
- Place the finished balls onto a parchment-lined tray. Melt a small handful of white chocolate chips in the microwave in 20-second intervals, stirring between each, until smooth. Drizzle over the tops of the balls for a beautiful finish. Refrigerate for 15 minutes to set before serving. Store in an airtight container in the fridge for up to one week.
Tip: Use culinary-grade matcha rather than ceremonial-grade for baking and energy bites — it’s more affordable, holds its flavor beautifully when mixed with other ingredients, and still delivers that vibrant green color and steady energy boost you’re looking for.
20. Peach Yogurt Freezer Bark
Prep Time: 15 minutes | Cook Time: 0 minutes | Serves: 9
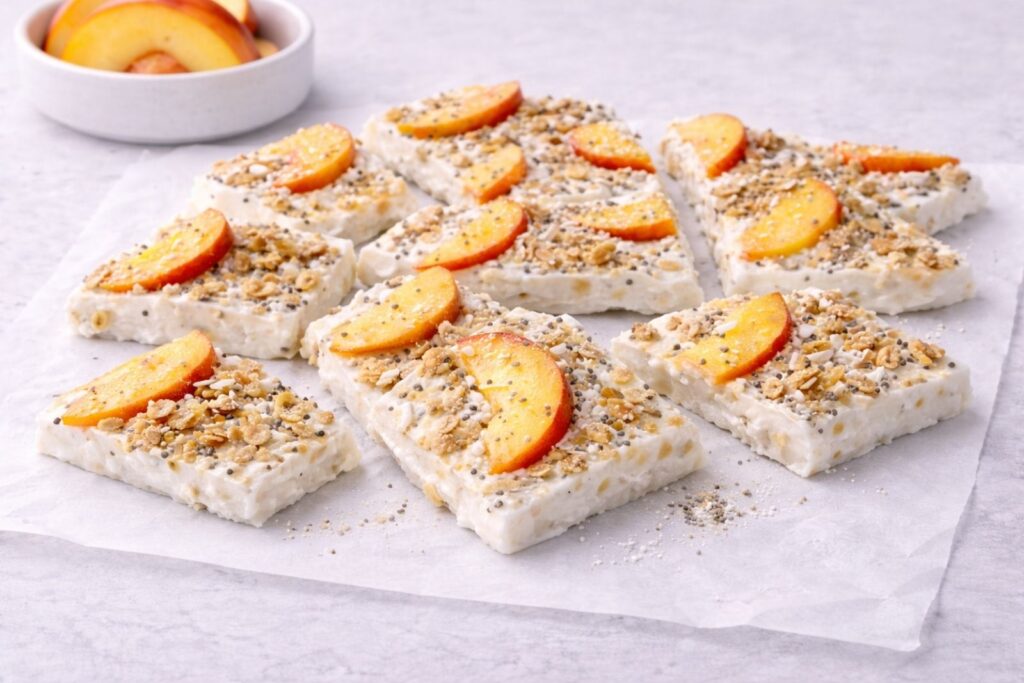
Peaches are rich in vitamins A and C, potassium, and natural antioxidants, making them one of the most beloved and beneficial spring and summer fruits. Blended with creamy Greek yogurt and frozen into bark, they become a cool, refreshing snack that’s high in protein and probiotics to support gut health. This is the kind of treat that feels like dessert but nourishes your body from the inside out — a perfect spring reward.
Ingredients:
- 3 cups plain full-fat Greek yogurt
- 2 large ripe peaches, peeled, pitted, and thinly sliced (plus extra for topping)
- 3 tablespoons honey or maple syrup, plus more to taste
- 1 teaspoon pure vanilla extract
- 1 tablespoon fresh lemon juice
- ¼ cup granola, for topping
- 2 tablespoons unsweetened shredded coconut, for topping
- 1 tablespoon chia seeds, for topping
- Optional: a light drizzle of honey over the top before freezing for extra sweetness
How to Make It:
- Line a large rimmed baking sheet with parchment paper, making sure the paper extends slightly over the edges for easy lifting once frozen. Set aside.
- In a large mixing bowl, combine the Greek yogurt, honey or maple syrup, vanilla extract, and fresh lemon juice. Stir everything together until completely smooth, creamy, and well blended. Taste and adjust sweetness with a little extra honey if desired.
- Pour the yogurt mixture onto the center of the prepared baking sheet. Using a spatula or the back of a large spoon, spread it out into an even layer about ¼ to ½ inch thick, working all the way to the edges for uniform freezing.
- Arrange the thinly sliced peach pieces evenly across the surface of the yogurt layer, pressing them down very gently so they nestle slightly into the yogurt without sinking completely.
- Scatter the granola, shredded coconut, and chia seeds evenly over the top for added texture, crunch, and nutrition. Add any extra toppings you love at this stage.
- If using, finish with a light drizzle of honey across the entire surface for a beautiful golden finish and a touch of extra sweetness.
- Carefully transfer the baking sheet to the freezer and freeze for at least 4 hours, or overnight, until the bark is completely solid and firm all the way through.
- Once fully frozen, lift the bark off the baking sheet using the parchment paper and place it on a clean cutting board. Break it into rustic, uneven pieces with your hands or use a sharp knife to cut it into neat portions. Serve immediately straight from the freezer.
Tip: Store the bark pieces in a single layer in an airtight container or zip-lock bag in the freezer for up to two weeks — place a small sheet of parchment between layers if stacking to prevent the pieces from sticking together.
You May Also Like
20 Healthy and Easy Spring Breakfast Ideas to Energize Your Morning
21 Fresh Spring Lunch Ideas That Are Healthy, Light, and Perfect for Warmer Days
22 Dreamy Spring Dessert Ideas to Sweeten Your Day
25 Vibrant Spring Dinner Ideas for Flavorful Evenings
24 Refreshing Spring Drink Ideas to Quench Your Thirst
Takeaways: 20 Easy Spring Snack Ideas for Quick and Delicious Munching
Spring is the perfect reminder that the best snacks are often the simplest ones — fresh seasonal ingredients, bright and vibrant flavors, and easy recipes that make you feel as good as they taste. Whether you went straight for the watermelon feta bites, the crispy lemon herb chickpeas, the peach yogurt freezer bark, or the mango lime energy balls, every healthy spring snack idea on this list was chosen with one goal in mind: to make your spring days a little more delicious, nourishing, and a whole lot brighter. These easy spring snack ideas make it simple to enjoy quick, delicious snacks using fresh seasonal ingredients.
Bookmark this post and come back to it anytime you need fresh inspiration — whether it’s a lazy spring afternoon, a weekend gathering, or just one of those days when you need something quick and satisfying to reach for. There’s always a new recipe here waiting for you to try. And if you loved this roundup of the best easy spring snack ideas, go ahead and share it with your family, friends, or that special someone in your life who loves good snacks just as much as you do — because great snacks are always better when shared. Happy munching!
