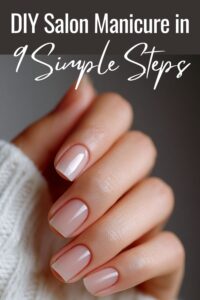
Want beautiful nails without leaving home? A salon-quality manicure doesn’t have to mean frequent salon visits or expensive appointments. With the right tools, proper preparation, and a little patience, you can achieve polished, professional-looking nails from the comfort of your own home. Learning how to do a manicure yourself allows you to take control of your nail care routine while still enjoying the clean, refined results you’d expect from a salon.
An at-home manicure is not only cost-effective but also a relaxing form of self-care. From shaping and cuticle care to careful polish application, each step plays an important role in the final outcome. When done correctly, a DIY manicure can last just as long and look just as neat as one done professionally. This step-by-step guide breaks down the process clearly, helping you build confidence and consistency while keeping your nails healthy and well-maintained.
Disclaimer: This manicure guide is for educational purposes only. Always take your personal nail health into consideration, and consult a licensed professional if you have concerns such as nail infections, damage, or allergies.
Step 1: Gather Your Tools and Supplies
Having all your tools ready before you start keeps the process smooth, stress-free, and mess-proof. A prepared setup helps you work efficiently and prevents interruptions that could affect the quality of your manicure.
How to do it:
- Lay out all tools on a clean, flat surface.
- Prepare nail polish remover and cotton pads.
- Make sure all polishes are opened and ready to use.
You will need:
- Nail polish remover and cotton pads
- Nail clippers and a nail file
- Cuticle remover and a cuticle pusher
- Hand scrub or mild exfoliator
- Hand cream or moisturizer
- Base coat, nail polish, and top coat
Step 2: Remove Old Nail Polish
Removing old nail polish creates a clean surface so your new color applies evenly and lasts longer. This step also helps prevent uneven texture and discoloration.
How to do it:
- Soak a cotton pad with nail polish remover.
- Press it onto the nail for a few seconds.
- Wipe gently until all polish is completely removed.
Step 3: Shape and File Your Nails
Shaping your nails defines the overall look of your manicure and keeps them neat and balanced. Proper filing helps reduce splitting and breakage.
How to do it:
- Trim your nails to your desired length.
- File in one direction only.
- Choose a shape such as round, square, or almond.
Step 4: Soak and Care for Cuticles
Soaking softens the skin around your nails, making cuticle care easier and more comfortable. Gentle cuticle maintenance helps protect your nails from infection.
How to do it:
- Soak your hands in warm, soapy water for 3–5 minutes.
- Pat hands dry with a clean towel.
- Gently push back cuticles using a cuticle pusher.
Step 5: Exfoliate and Moisturize Hands
Exfoliating removes dead skin cells and improves the appearance of your hands. Moisturizing restores hydration and leaves skin smooth and soft.
How to do it:
- Apply a hand scrub and massage gently.
- Rinse thoroughly with water.
- Apply hand cream and massage until absorbed.
Visual Guide: At-Home Manicure Steps Made Simple
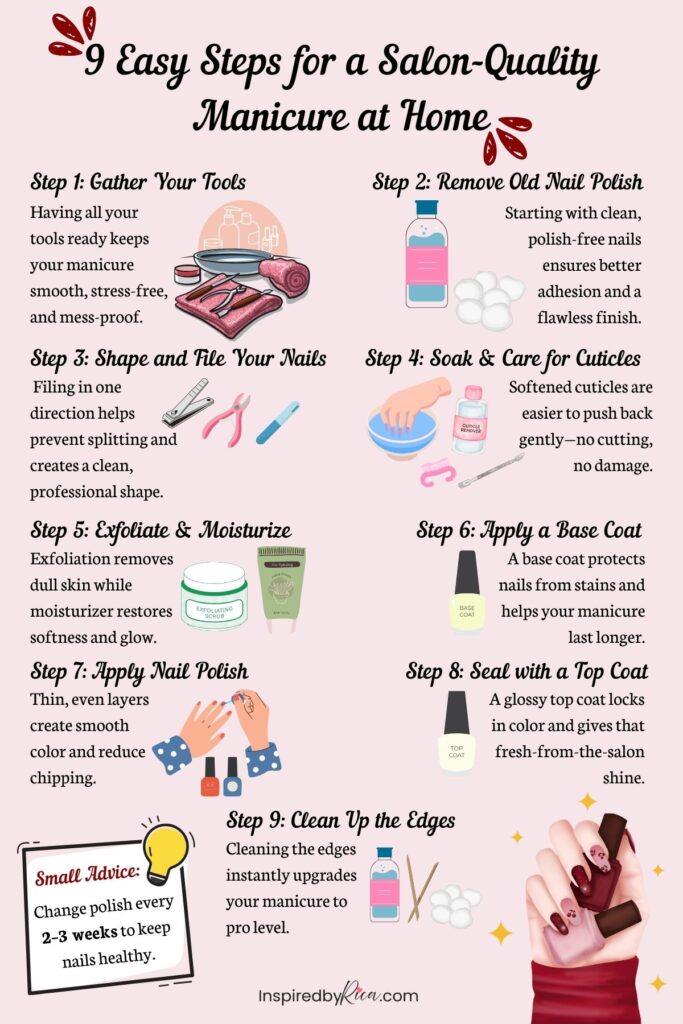
Step 6: Apply a Base Coat
A base coat creates a smooth foundation for nail polish and helps prevent staining. It also improves polish adhesion and longevity.
How to do it:
- Apply one thin, even layer of base coat.
- Avoid touching the cuticles or skin.
- Allow the base coat to dry completely.
Step 7: Apply Nail Polish
Applying polish in thin layers ensures even coverage and a clean finish. Proper application helps prevent streaks, bubbles, and smudging.
How to do it:
- Apply a thin layer of polish to each nail.
- Start at the center, then move to the sides.
- Allow each coat to dry before applying the next.
- Repeat for 2–3 coats if needed.
Step 8: Seal with a Top Coat
A top coat adds shine and protects your manicure from chipping. Regular maintenance keeps nails looking freshly done.
How to do it:
- Apply one layer of top coat over dry polish.
- Seal the tips of your nails if possible.
- Let the nails dry completely.
Step 9: Clean Up the Edges
Cleaning the edges refines your manicure and gives it a neat, professional appearance. This step corrects small mistakes and sharpens the final look.
How to do it:
- Dip a small brush or cotton swab into nail polish remover.
- Carefully clean around the edges of each nail.
- Allow nails to fully dry.
Small Advice: Do not keep nail polish on your nails for too long. Change your polish every 2–3 weeks to prevent brittleness and maintain healthy nails.
FAQ (Frequently Asked Questions)
How long does a DIY manicure last?
A well-done at-home manicure can last around 5–7 days, depending on your nail care routine and daily activities.
Why does my nail polish chip so quickly?
Chipping often happens due to applying thick layers, skipping a base or top coat, or not allowing enough drying time between layers.
How can I make my manicure last longer?
Apply thin layers, seal with a top coat, avoid water exposure right after application, and moisturize your hands regularly.
Can I do a manicure without professional tools?
Yes. Basic tools like a nail file, cuticle pusher, and quality polish are enough to achieve clean, neat results at home.
You May Also Like
Daily Skincare Routine: 5 Essential Steps for Every Skin Type
7 Simple Tips for Shiny & Healthy Hair
6 Tips for Choosing the Perfect Foundation Shade
Takeaways: Steps on How to Do a Salon-Quality Manicure at Home
A successful at-home manicure is built through routine and care rather than perfection. When you consistently follow a simple nail care process, your results improve over time. Proper preparation, gentle cuticle maintenance, and allowing enough drying time all contribute to stronger, healthier nails and a manicure that lasts longer. These small but intentional habits help reduce chipping, dryness, and breakage.
Turning nail care into a regular habit makes it feel less like a task and more like a form of self-care. Save this guide so you can revisit it whenever you need a refresher, and feel free to share it with loved ones or anyone who enjoys doing their own manicures. A clear, easy-to-follow routine like this builds confidence and makes it easier to keep your nails looking neat, polished, and well cared for every day.
Author’s Note:
I have a background in cosmetology and enjoy sharing practical, experience-based beauty and skincare tips. This content is not medical advice—please consult a licensed professional for specific concerns.
